If you’ve never eaten a potato that has just been dug out of the soil, you’re really missing out on an amazing treat. Follow the directions below to see how you can grow potatoes in your own operation. It’s easy to do, and you only need a handful of items. Plus, you don’t even need a garden to get started.
There are several advantages to growing potatoes in a container:
- It’s easier to protect the potatoes from pests, weeds, and Mother Nature
- It’s a fun learning opportunity for students because potato plants grow stunningly fast
- You can use them as a teaching tool for a variety of school subjects
- You can grow them year-round
- Kids love potatoes
Here’s what you’ll need to get started:
- The potato type that you’d like to grow
- A container with sufficient drainage
- Soil
- Lots of sun
- Water
Directions:
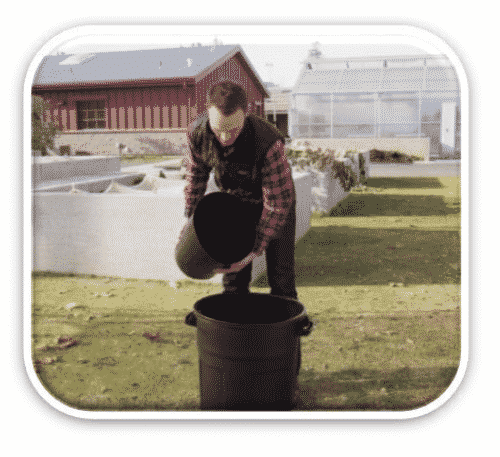
Step One: First you’ll need a container. It’s possible to grow potatoes in any container, from large garbage cans to small containers or stacks of tires. If the container doesn’t come with drainage, make sure you add some by drilling holes at the bottom. A large 30-gallon garbage receptacle can work. For quicker growth, any smaller size can or container/ planter. The larger the container to more potatoes you’ll get, but also the longer the g row time. Whatever container you choose, make sure there is a hole at the bottom for drainage. As for the contain you choose, it could be fun for the school’s art class to paint it or decorate it with school colors. Also, if the potatoes will be grown in the classroom, you’ll need something to go under the containers to catch the any drain age.
Step Two: Fill the container with approximately 6 inches of soil. Quantity depends on the size of the container. It’ll need at least a couple of inches of depth for the potato roots to start to grow.
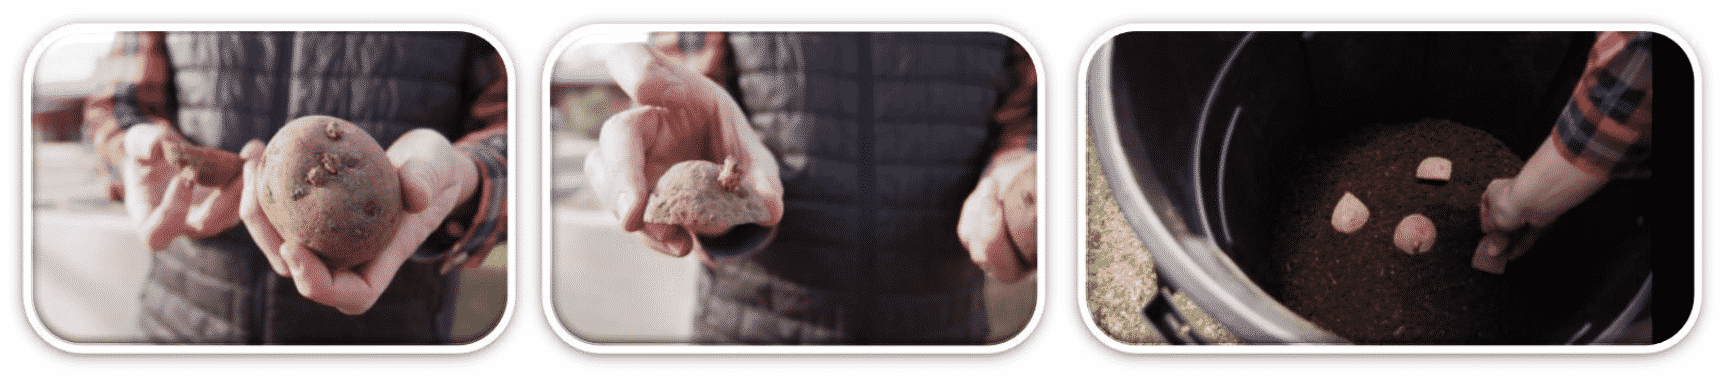
Step Three: When you’re ready to plant, you can choose a seed potato or you can use store-bought organic potatoes that you’ve allowed to sprout in a cool dark place. Certified seed potatoes can be purchased from a garden store. The eyes should be sprouting!
What ’s interesting about the potato is that the flower it produces is the color of the type of potato growing. Therefore, you can have red, white, or blue flowers. Depending on how many students you have or how many potatoes you hope to grow, you can have several smaller containers with different types of potatoes. You can also have just one container for all the students to work on.
What ever the case, you can either plant your potato whole, or cut the potato into quarter pieces, that have at least two eyes per piece. Place the pieces 6-12 inches apart on top of the soil.
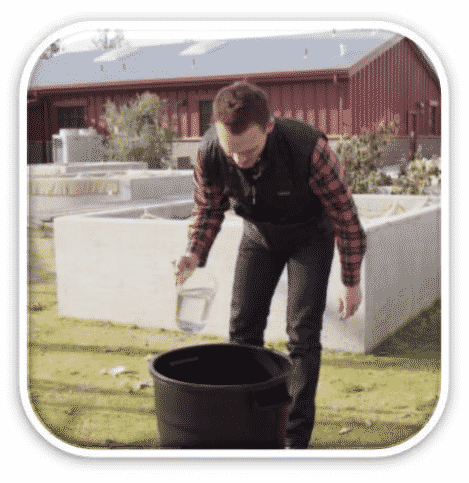
Step Four: Add three to four more inches of soil to cover the potatoes, then water the soil until it’s damp, but not soggy.
Step Five: Now it’s time to watch your potatoes grow. Make sure your plants are getting plenty of sunshine and water.
Step Six: For every 7-10 inches of growth, add 3-4 more inches of soil around the base of the plant. Be careful not to break the plant while doing this.
Step Seven: Continue to repeat this process until the soil reaches the top of your container.
Step Eight: After about 60 days the potatoes begin to bulk up as the plant also produces flowers. You can begin to harvest potatoes any time after the plants have flowered. The longer you wait, the bigger the potato es can become. Once the potatoes are mature the plant begins to die an d it is time to harvest. In general, total time between planting and harvest is about four months.
Step Nine: When you’re ready, just simply empty the container out on a tarp and dig out those potatoes! Be sure to wash the potatoes before consuming.
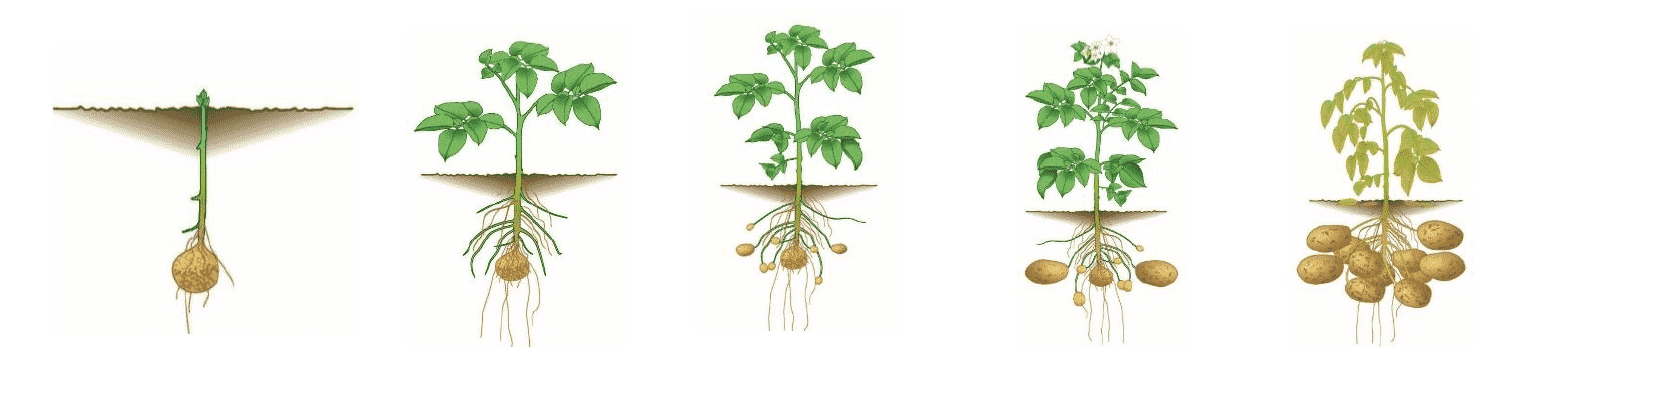
Here you can see the life cycle of the potato, starting with the plant emerging from the seed piece that’s planted in the ground. At first the growth is more on the plant and roots to make sure it is viable and healthy. Then the potatoes begin to develop.